Shrimply Explained is currently undergoing renovations. Please don't buy anything yet. Thank you!
You and your shrimp deserve the best and Shrimply ExplainedTM is here to provide that. This lesson is part of our Shrimp Basics (SB) Series, which covers important information needed to raise healthy and happy shrimp. Check out SB101: Are Shrimp Right for You? if you want to start from the beginning.
Please reach out to us via social media or email for any help with your tank, feedback on our content, or just to talk about shrimp!
Sincerely,
Rick and Shrimply
Shrimply Explained™ is a participant in the Amazon Services LLC Associates Program, an affiliate advertising program designed to provide a means for sites to earn advertising fees by advertising and linking to Amazon.com.
To define it more clearly:
Cycling is the process of developing a healthy microbiome (microbial environment) to support aquatic life in an enclosed system. The “cycle” is specifically referring to the nitrogen cycle, which is the movement of nitrogen-based compounds through the ecosystem.
The microbes we are most concerned about are called beneficial bacteria, often shortened to BB. BB help protect the ecosystem by breaking down animal waste and decaying plant matter. They are also referred to as “nitrifying” bacteria because they feed on toxic nitrogen-based compounds and convert them into less toxic forms. It may be useful to know that lower pH and temperature reduce the growth rate of BB, along with their ability to break down waste.
BB grow on surfaces in your tank (plants, filter media, substrate, etc.) so their population is limited by available surface area. Plants, substrate, and filter media provide additional surface area for BB to grow on. When a large amount of surface area is removed from the tank (i.e. filter cleaning/changes, substrate replacement, plant removal) then this also removes BB, which can disrupt the cycle and lead to huge headaches as you try to re-establish it. Knowing how to properly start and maintain the cycle makes the shrimp keeping hobby so much less stressful, which is why we're covering everything you need to know in this guide!
So, we’ve explained a few key terms and covered why cycling is important. Let's get into the steps to cycle your tank.
Add all of your substrate, water (that’s already been dechlorinated or remineralized!), filter, heater (if needed), plants, and any other décor. Basically everything except the animals.
These are your trained survivalists who handle the initial harsh conditions in your tank while providing an ammonia source to start and eventually maintain the cycle. This is known as a bio-load.
The bio-load (biological load) refers to the amount of ammonia produced by a given species OR the total amount produced by all animals in a tank. Animals like shrimp and small snails produce little ammonia as individuals so have a low bio-load, but hundreds of them can have a high bio-load. When the bio-load is too low (understocked) or high (overstocked) for the established BB, then a cycle crash can occur, resulting in an ammonia spike that stresses or kills inhabitants (especially shrimp).
A strong base for bio-load is provided by snails so your cycle does not get disrupted when adding new animals into the tank. They also eat excess food and clean the tank, which helps create a stable environment when your shrimp arrive.
Ammonia
Ammonia (NH3 or NH4+ depending on pH) is a nitrogenous (nitrogen-based) chemical released from animal waste, active substrates, and decaying matter. It is quite toxic to animals but acts as a food source for plants and certain bacteria. Ammonia is converted into nitrites by BB (specifically Nitrosomonas sp. and Nitrococcus sp.) in a process called nitrification.
Nitrite
Nitrite (NO2-) is a nitrogenous compound produced when ammonia is broken down. It is less toxic than ammonia but still harmful to tank occupants. Nitrites are converted to nitrates by BB (specifically Nitrobacter sp.) or removed by plants.
Nitrate
Nitrate (NO3-) is a nitrogenous compound that is much less toxic (about 31x less) than ammonia or nitrites. It is removed from the water by plants or water changes.
Recommended Types of Snails
#1 - "Pest" Snails (ramshorn, bladder, and pond snails)
They’re super cheap, excellent survivalists, and they protect from overfeeding whenever you finally add shrimp to the tank. Most importantly, they provide an adaptive bio-load that grows as your tank matures since they reproduce according to how much food is available. Many plants come with these snails (even if they claim to be snail-free) but you can also go and buy some or look for hobbyists giving them away. While you can end up with a lot of them, their population won’t grow out of control unless you overfeed.
#2 - Mystery, Nerite, or Rabbit Snails
These snails are all slow (or unable) to reproduce in freshwater tanks so many shrimp keepers prefer them over Option #1. They come in a wide variety of appearances and can be a cool addition to your tank but you will have to go out and buy them. To provide a high enough bio-load for your cycle, we generally recommend adding 1-2 for every 10 gallons of water in your tank.
Please note that these snails are not as hardy as bladder, pond, or ramshorn snails, so we recommend adding a pre-cycled filter or bottled beneficial bacteria (like FritzZyme 7) to the tank at the same time as the snails are added.
Snails to Avoid:
Apple snails – These snails will eat all but the toughest plants in your tank. Since shrimp love plants, we do not recommend keeping apple snails in the same tank.

Add a small amount of food 1-2 times a week for 6-8 weeks. The food keeps the snails alive and acts as an ammonia source. If the food isn’t gone within a day or so, then feed less to avoid making your tank too dirty.
“6-8 weeks?? I’ve read that you can cycle a tank in a few days just by adding a bottle of BB.”
That’s true, but there are a few issues with what we’ll call the “fast-cycling” method that are especially problematic for shrimp keepers. First off, a cycled tank does not mean a stable tank. Even with the addition of BB, plants and other organisms take time to adapt to new water conditions and these adaptations affect water parameters. 6-8 weeks is a safe amount of time for the ecosystem to establish, at which point your tank is considered “mature” or “seasoned” enough for your shrimp to thrive in.
The other problem is that the main food source of shrimp is biofilm, which they need to eat constantly. A tank that’s only a few days old doesn’t have any biofilm in it so essentially is a barren wasteland from a shrimp’s perspective. Sure, you can add plants and a filter from an established tank to provide biofilm, but that often isn’t enough to support a healthy shrimp colony. It’s also not enough to support baby shrimp since they stay in one place initially and there are many places in a new tank that don’t have enough food for them.
At Shrimply Explained, our goal is to give you the best chance of success in the shrimp keeping hobby. That’s why we highly, HIGHLY recommend letting your tank mature for 6-8 weeks despite faster methods being available. Your shrimp will thank you.
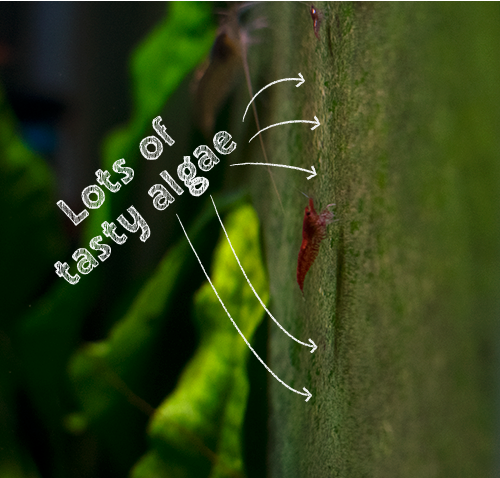
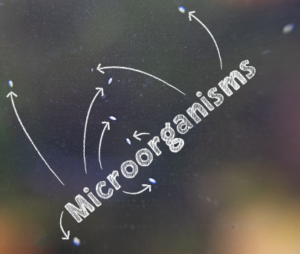
During the grow-out period, you may find some weird stuff like algae, white fuzzy stuff, and small moving specks. That is all totally normal and explained in the Additional Information section at the end of this guide, if you’re interested.
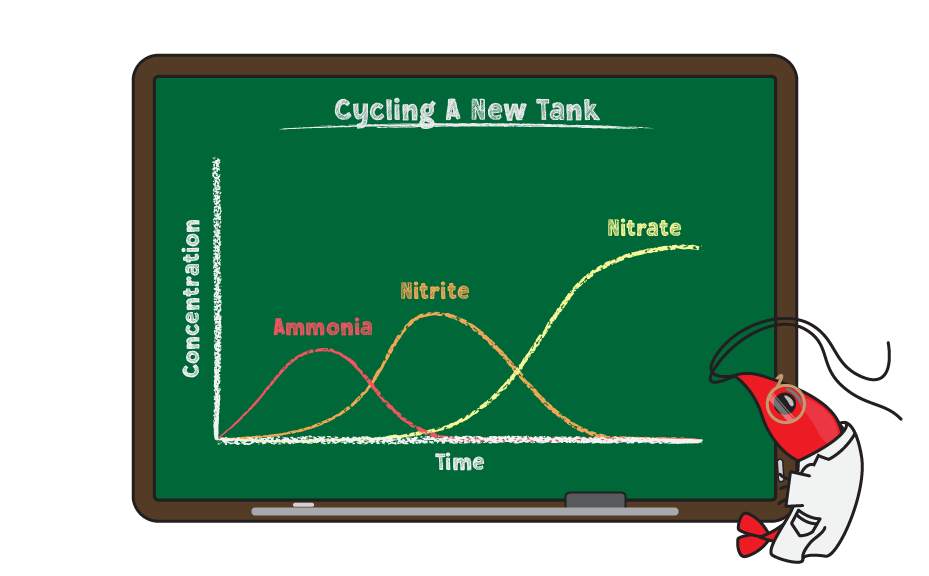
A diagram of a complete, healthy cycle that develops by the end of the Grow Out period is provided below:

After 6-8 weeks, your ammonia/nitrites should have risen and fallen to acceptable levels, as depicted in the graph below:
Ideal Water Parameters:
Ammonia: 0 ppm
Nitrites: 0 ppm
Nitrates: <20ppm (ideally < 10ppm)
If your tank parameters match those above and if you’ve seen plant or algae growth, then you are ready to add your shrimp! If ammonia or nitrites are present, then wait another week (or at least a few days) then test again. High nitrates can be dealt with by performing water changes until your tank reaches acceptable levels.
That’s it – Just four simple steps to create a consistently great shrimp tank in 6-8 weeks.
The next part of your shrimp journey is to add shrimp! This seems like it should be easy, but even experienced aquarists struggle with acclimating their shrimp since the procedure is different from fish acclimation. Continue on to the next section to learn how to safely acclimate new shrimp into their cycled tank and avoid unnecessary shrimp deaths that many new shrimp keepers experience.

Aquarium Test Strips - 100 Strip Pack
Tests for pH, KH, GH, nitrites, nitrates, and chlorine. Does NOT test for ammonia. There are cheaper test strips available but those can be so inaccurate as to be effectively unusable. It's not worth saving money on water tests if their unreliability causes your shrimp to die.
+
API Ammonia Test Kit - 130 Tests
It is extremely important to have an accurate measurement of ammonia due to its toxic nature. Unfortunately, there are no ammonia test strips currently available that we trust. In addition, the ammonia strips tend to be near the same price per test as the API Ammonia Test Kit so there is no good reason to risk using strips.
API Freshwater Master Test Kit - 120 Tests
Accurately and reliably test pH, ammonia, nitrites, and nitrates. This is the most commonly used liquid test kit and is recommended for all hobbyists. Please note that it does not come with GH and KH tests so those must be bought separately.
+
API GH and KH Test Kit - 130 Tests
This product contains both GH and KH liquid test kits. They are measured in drops or degrees GH/KH (dGH or dKH) instead of ppm used by test strips. Because the kits are so widely used, it is easy to get help with how to use them or interpretation of the results.
Microorganisms
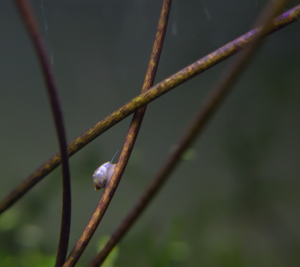
Quite a few shrimp keepers get surprised when they see little white dots and squiggly lines swimming around or crawling on the glass. Don’t worry—Most of them are harmless little critters that help to break down waste in your tank. Some of the common harmless types are copepods, daphnia, limpets, rhabdo worms, and detritus worms.
Normally, these organisms come in on your plants, from the bags your animals are transported in, or through food. Even when plants and food are treated beforehand, some eggs of these microorganisms are extremely hardy and may still make it into your tank. Again, they are perfectly harmless and do help stabilize the ecosystem but some people don’t like the look of them. If you see a lot in your tank, then that’s a sign that there is excess food. Once you cut back on food added to the tank, you’ll see their population naturally decline within a couple of weeks. Another control option is to put fish in your tank, but just know that some baby shrimp may get eaten along with the microorganisms.
Biofilm/Mold
You may also be surprised by white fuzz growing on leftover food and driftwood. This is a common mold with biofilm that shrimp and snails love to eat. You can remove it manually, but it is easiest to let it go away on its own.
To get new lesson notifications and receive other fun shrimp-related content, feel free to subscribe to our newsletter and follow us on social media.
Have a great day and happy shrimpin’!