Shrimply Explained is currently undergoing renovations. Please don't buy anything yet. Thank you!
Good, consistent water quality is key to successful shrimp keeping. Just as air tainted by chemical fumes or strawberry-unicorn’s-blood-flavored vape smoke can harm humans, poor water can reduce the health of your beautiful shrimp. As such, your first step in setting up a shrimp tank is to measure the parameters of your tap water. Once you know those, then you can figure out what changes must be made, if any, to ensure your tap water is suitable for shrimp. There can still be problems with tap water even if the parameters seem right, which is why many shrimp keepers opt to use RO/DI (highly purified) water instead of tap water. This lesson provides a detailed look at that decision to help you choose which is best for you and the shrimp.
We’ll start by covering what water parameters are important and how to measure them in your tap water. After that, we’ll cover why many hobbyists choose to use RO/DI water over tap water for their shrimp tanks, even if tap water seems to have the right parameters. Finally, we’ll finish off with how to condition tap water to make it safer for shrimp, if you choose to use it.
You and your shrimp deserve the best and Shrimply ExplainedTM is here to provide that. This lesson is part of our Shrimp Basics (SB) Series, which covers important information needed to raise healthy and happy shrimp. Check out SB101: Are Shrimp Right for You? if you want to start from the beginning.
Please reach out to us via social media or email for any help with your tank, feedback on our content, or just to talk about shrimp!
Sincerely,
Rick and Shrimply
Shrimply Explained™ is a participant in the Amazon Services LLC Associates Program, an affiliate advertising program designed to provide a means for sites to earn advertising fees by advertising and linking to Amazon.com.
Previous lessons have covered water parameters like pH, KH (carbonate hardness), and GH (general hardness), in terms of what they are and how to control them. Now it’s time to put that knowledge to the test by measuring your tap water for those parameters, along with other important ones like ammonia, nitrites, nitrates, and possibly copper. Once you know what’s in your water, then it’s easy to figure out what changes, if any, must be made to create a suitable environment for shrimp.
To be clear, there is not one set of parameters that all shrimp thrive in. Be sure to thoroughly research the care requirements of all species you want in the tank to ensure their parameters match up. For basic overviews of common species and their required water parameters, please see Lesson 2: Types of Freshwater Shrimp.
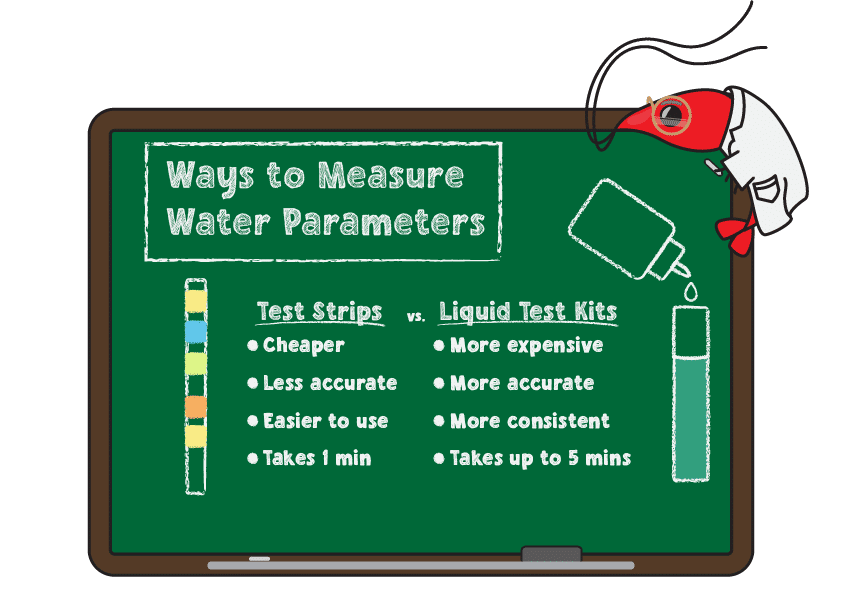
While discoloration or bad taste are signs that water quality may not be great, you need more accurate measurements to ensure a healthy shrimp tank. As such, start by getting test strips or liquid test kits that cover all the following parameters: pH, KH, GH, ammonia, nitrites, nitrates, and chlorine. Shrimply Explained highly recommends the liquid test kits because their results are far more consistent and accurate. Test kits are cheaper but less reliable, which may result in either thinking there is a problem when there isn't or not discovering a problem that is present. The money saved on test strips may be quickly lost if you have to replace a colony of shrimp.
To review, here is a comparison between test strips and liquid test kits:
Aquarium Test Strips - 100 Strip Pack
Tests for pH, KH, GH, nitrites, nitrates, and chlorine. Does NOT test for ammonia. There are cheaper test strips available but those can be so inaccurate as to be effectively unusable. It's not worth saving money on water tests if their unreliability causes your shrimp to die.
+
API Ammonia Test Kit - 130 Tests
It is extremely important to have an accurate measurement of ammonia due to its toxic nature. Unfortunately, there are no ammonia test strips currently available that we trust. In addition, the ammonia strips tend to be near the same price per test as the API Ammonia Test Kit so there is no good reason to risk using strips.
API Freshwater Master Test Kit - 120 Tests
Accurately and reliably test pH, ammonia, nitrites, and nitrates. This is the most commonly used liquid test kit and is recommended for all hobbyists. Please note that it does not come with GH and KH tests so those must be bought separately.
+
API GH and KH Test Kit - 130 Tests
This product contains both GH and KH liquid test kits. They are measured in drops or degrees GH/KH (dGH or dKH) instead of ppm used by test strips. Because the kits are so widely used, it is easy to get help with how to use them or interpretation of the results.
Check the parameters against those recommended for your desired shrimp species. Be aware that, even if tap water parameters remain stable for the most part, you never know when they may change due to variations at water treatment plants. As such, we advise testing your tap water a few times over a week or more when starting out to see how consistent the parameters are.
Pro Tip: Measure your tap water with every water change to confirm parameters are the same. Doing so significantly reduces the risk of something horrific happening to your tank.
Once testing is complete, many shrimp keepers find that their tap water has acceptable parameters for less sensitive shrimp species (Neocaridina, Amanos, ghost shrimp, etc.). If so, then fantastic—Tap water is the cheapest and easiest way to go. Just be aware that frustrating problems can occur with tap water even when all parameters are in range. That’s because there can be additional chemical and microbial contaminants in tap water that the tests don’t pick up. In addition, GH measurements that are in-range do not guarantee the correct mineral content, as discussed in Lesson 4: The Basics of GH in Your Aquarium. Signs of unsuitable tap water include failed molts, slow growth, low breeding rate, or death.
Again, hobbyists around the world have success with using tap water for hardier shrimp like those mentioned previously but it is important to understand potential problems. This allows you to make the most informed decisions for the health of your shrimp and prevents frustration in the future.
If your tap water does not have the right parameters or if you are experiencing any of the previously mentioned problems even when all parameters seem right, then it is worth considering remineralized RO/DI water for your tank. The next section explains the benefits of using RO/DI water over tap water but, if it is not right for you, then the final section of this lesson covers possible ways of correcting your tap water.

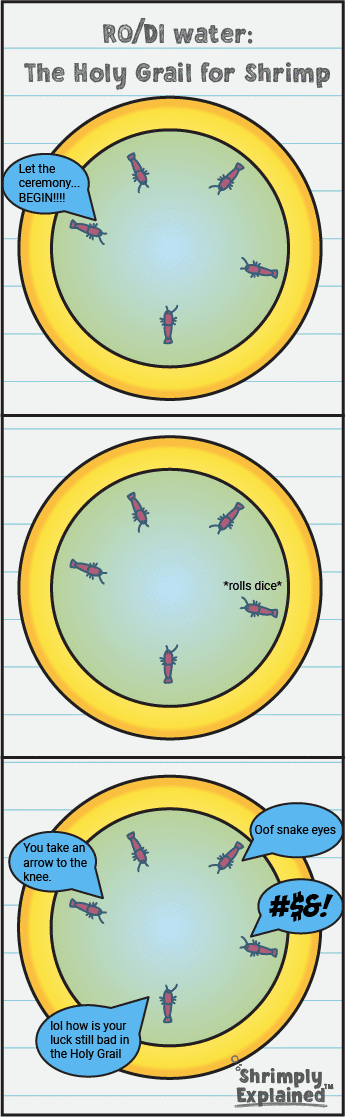
As mentioned in previous lessons, RO/DI stands for Reverse Osmosis and Deionization. These are water purification methods that remove all chlorine, chloramines, minerals, heavy metals, and bacteria. Necessary minerals are then added back into the purified water with a remineralizer to guarantee the perfect mineral content (Shrimply Explained recommends the Salty Shrimp brand). This water is basically the Holy Grail of shrimp keeping, in that it provides the healthiest environment for them to live long and prosper.
Sounds great, right?
Well, there are some downsides to RO/DI water, specifically concerning how to get it. Your options are either to:
Obviously, these options are not available to everyone due to location or budget and, for many hobbyists, tap water is enough to have a thriving shrimp tank. It isn’t always though, so be sure to follow the previously recommended steps to measure tap water parameters. If you decide to use tap water and find your shrimp tank struggling despite proper feeding, water changes, etc., then switching to remineralized RO/DI water is likely to solve your problems.
Since tap water comes with more potential complications than RO/DI water, the remainder of this lesson is dedicated to making your tap water hospitable to shrimp when parameters are initially out of range.

As with any aquarium, always add a dechlorinator to remove chloramines and chlorine from any water going into the tank. In addition, dechlorinators like SeaChem Prime® react with ammonia, nitrites, and nitrates to reduce their toxicity. The compounds do not go away but this gives plants and filters time to remove them before the reaction reverses. Aside from water changes, this knowledge may be life-or-death if your cycle crashes and you need to detoxify ammonia build-up.
Oh, and SeaChem Prime® removes toxic heavy metals, although that does not mean it will remove copper.
If this wasn’t already clear, Shrimply Explained recommends SeaChem Prime® for a dechlorinator/detoxifier.
Wait, what? Didn’t we just cover this??
Kind of, but there’s more.
While tap water is regulated to be safe for humans, it can still contain unhealthy levels for shrimp. That’s why it’s so important to measure the water every time before doing a water change and to use SeaChem Prime®. Prime® does detoxify ammonia, nitrites, and nitrates but it’s more of a band-aid than a solution. If there isn’t sufficient filtration or plant growth, then Prime® may wear off and let these compounds become toxic, thereby overwhelming your tank cycle and killing your shrimp.
If your tap water has high levels of ammonia, nitrites, or nitrates, then it’s best to put it in a bucket with a bunch of fast-growing plants like duckweed, red-root floaters, etc. The plants will filter out these compounds to provide cleaner water. The only problem is that it’s hard to avoid adding the fast-growing plants to your tank so duckweed will invade. Some people hate it but it’s really not that bad.
For those of you who have been following along with the lessons in order, all the remaining information about controlling pH, KH, and GH has been discussed previously.
High KH causes elevated pH levels which may be stressful while high GH causes molting problems. Lowering these parameters is a good idea if you have either of these issues.
The most controlled way to lower GH and/or KH is to dilute your tap water with RO/DI water. For example, if your GH is twice what it should be, then mix 50% tap water with 50% RO/DI water. Doing this is still quite a bit cheaper than using 100% remineralized RO/DI water.
Other options for lowering GH and KH require more guesswork. For more information on lowering GH, please review the GH control section in Lesson 4: The Basics of GH in Your Aquarium. For more information on lowering KH, please see the KH control section in Lesson 3: The Basics of pH and KH in Your Aquarium.
The most controlled and cost-effective way to raise GH and/or KH is to use remineralizers. To use them, simply add remineralizer to the water you plan to add into the tank until you reach the desired GH and KH. Do not add remineralizers directly to the tank as they can cause a large shift in parameters that may stress out your shrimp.
These products can either be GH-specific or GH+KH so pay attention to that before you buy. Shrimply Explained recommends the following remineralizers:
pH is closely tied to KH so adding a remineralizer also raises pH. Other options include Wonder Shells or crushed coral/aragonite, which dissolve to release calcium carbonate into the water. It is difficult to predict the rate that these products give off calcium carbonate so always start with a small amount in the tank and monitor closely to avoid rapid changes.
There are many methods of lowering pH. Adding RO/DI water is the most controlled way of doing it, but you can also add anything that releases tannins, including driftwood, peat moss, cholla wood, or Indian almond leaves. Another option is active substrate, which will be covered in-depth in another lesson coming soon.
Click here for more information about controlling pH in your shrimp tank.
Now you know everything needed to decide what type of water to use in your shrimp tank and how to condition tap water to make it safe, should you choose to use it. Again, always measure the parameters of your tap water before putting it in your tank to avoid many common problems that shrimp keepers face. It’s the best way to keep your shrimp happy and healthy.
With the most important part of your shrimp tank setup decided, now it’s time to go over how to cycle a shrimp tank. Use the Navigation bar below to continue to the next lesson SB 106: Cycling a Shrimp Tank.
To get new lesson notifications and receive other fun shrimp-related content, feel free to subscribe to our newsletter and follow us on social media.
Have a great day and happy shrimpin’!


